


U-PROX PIR
Wireless motion detector that is insensitive to animals

Over-the-Air (OTA) Automatic Update

Intelligent motion detection

Minimalist design

Viewing angle 880

Up to 5 years of battery life

Remote sensitivity setting

The fastest way to control
Gallery
Photos and videos


Certificates
NEW PRODUCTS
Flexible system management, instant notifications and key features help take your safety and comfort to the next level

Want to buy?
Contact partner companies to purchase or install security and automation devices.
Want to sell?
Become an official distributor, reseller or installer of U-PROX security and safety systems.
Technical Specifications
| Maximum working distance | 12 m |
|---|---|
| Detection angle | 88° |
| PIR target detection speed | 0.3 ... 3 m/s |
| Optical noise immunity | not less than 6500 Lux |
| Pet immunity | movement of animals weighing up to 20 kg |
| Power |
3V, CR123A lithium battery included |
| Service life of battery | up to 5 years |
| Radio frequency |
ISM wireless interface with multiple channels: ITU Region 1: 868.0...868.6 MHz (EU, UA), 869.0...869.4 (MA), 100 kHz bandwidth, 20 mW max, distance - up to 4800m (in open space); ITU region 3 (AU): 916.5...917 MHz, 100 kHz bandwidth, 20 mW max, distance to devices - up to 4800 m (in open space). |
| Communication |
Two-way, encrypted, with sabotage (jamming) detection. The encryption key is 256 bits |
| Operating temperature range | -10°C ... +55°C |
| Permissible humidity | up to 75% |
| Environmental class | II (according to EN 50131-1) |
| Security grade | 2 |
| Dimensions | 90 х 60 х 34.35 mm |
| Dimensions & weight with a wall bracket | 90 x 60 x 41.6 mm |
| Dimensions & weight with an angle bracket | 90 x 60 x 48.84 mm |
| Case colour | white, black |
| Weight | 0,13 kg |
| Complete set |
1. U-Prox PIR; 2. CR123A battery (pre-installed); 3. Wall bracket; 4. Corner bracket; 5. Mounting kit; 6. Short user manual |
Color


+1


+1
U-PROX PIR User manual
Description
U-Prox PIR is a digital passive infrared radio channel sensor equipped with a PIR sensor and an animal-resistant lens.
The device is designed to protect closed residential and industrial premises.
Based on changes in the thermal balance of the environment, it sends a signal of intrusion to the U-Prox security alarm center.
It is installed indoors.
The sensor works only with the U-Prox security system, it cannot be connected to third-party systems.
Security warnings
WARNING. THE APPLIANCE HAS A BUILT-IN BATTERY. SUBSTITUTING AN INCORRECT TYPE OF BATTERY FOR THE APPLIANCE MAY RESULT IN A FIRE OR EXPLOSION. DISPOSE OF USED BATTERIES IN ACCORDANCE WITH LOCAL LAWS AND REGULATIONS.
Applications for customization
U-Prox Installer mobile application
Application for setting up the U-Prox wireless security system. It is intended for both individual users and engineers of central monitoring stations. Using a mobile phone, the app allows you to perform full security system setup: install, test, and calibrate wireless system elements; configure security groups; connect to monitoring stations; add users and give them the right to control the security system from the U-Prox Home app.

Installer web portal
The U-Prox Installer WEB web portal is designed to configure the U-Prox wireless security system. It is intended for both individual users and engineers of central monitoring stations of security organizations. Using a web browser, you can perform full configuration of the security system: install, test, and calibrate wireless system elements; configure security groups; connect to monitoring stations; add users and grant them the right to control the security system from the U-Prox Home app.

https://web-security.u-prox.systems/
Functional elements of the device
 |
|
Power supply
The device uses a CR123A lithium battery, which allows it to operate for up to 5 years on a single battery.
Display in the current mode
The light indicator shows data transmission and sensor triggering. Data exchange with the security center, LEDs light up sequentially:
-
- Sensor triggering – red
- Data transmission:
- Green – transmission is successful
- Red – data transfer failed
- Receiving confirmation:
- Green – reception is successful
- Red – data reception failed
Steps 2 and 3 can be repeated up to 3 times (transmission repeats with increased power)
Installation
Selecting the installation location
Choose the installation location of the U-Prox PIR Combi device carefully, taking into account the direction of the lens, microphone, and any obstacles that may limit the sensor’s view.
The sensor should be installed in such a way that the area of the most likely glass breakage or intrusion is located in the sensor’s maximum field of view and the direction of the intruder’s movement is perpendicular to the installation axis.
 |
To maximize the sensor’s viewing area, install it at a height of 2.1 meters from the floor level.

The appliance must not be placed:
- Outdoors or in rooms with unacceptable humidity and temperature
- In places with a high level of radio interference
- Near objects that can cause attenuation or shielding of the radio signal (metal, mirrors, etc.)
- In such a way that direct sunlight hits the sensor lens
- Opposite objects with rapidly changing temperatures or in places with rapid air circulation
- Opposite moving objects with the human body temperature
- At a distance closer than 1 m from the security center
It is recommended to perform the installation in the following sequence:
- Register the sensor in the security system using the U-Prox Installer app
- Select the installation location with the optimal signal using the U-Prox Installer app. (Note: The sensor can be placed either vertically or horizontally.)
- Install the backplate
- Install the device
Installation
- Two backplates are included – one for angled installation of the device and one for flat installation of the device
Mount the desired type of backplate using the screws and dowels provided.
 |
 |
Place the device on the backplate and slide it downward to engage and lock the tamper contact. Flashes on the indicator light will confirm that the tamper is locked.
 |
 |
For a flat surface – Corner backplate
WARNING! WHEN THE DEVICE IS INSTALLED CORRECTLY, THE TAMPER WILL BE CLAMPED (LOCKED).
Turning on and off
Press and hold the button
![]()
for 3 seconds to turn on the device – the indicator light will be on.
If the device has already been registered in the security system, it switches to the standby mode.
To turn off the device, press and hold the button for 5 seconds until the light indication goes out.

WARNING. IF THE DEVICE HAS NOT BEEN REGISTERED, IT WILL GO INTO SLEEP MODE AFTER 30 SECONDS.
Settings
- Download and install the U-Prox Installer mobile application to configure the system
- Launch the U-Prox Installer application and log in or log in using the U-Prox Installer WEB portal
IF NECESSARY, REGISTER IN THE SYSTEM AS AN AUTONOMOUS INSTALLER OR GET ACCESS AS AN INSTALLER OF A SECURITY COMPANY
Adding a device to the security system (registration)
- Launch the U-Prox Installer application or open the web portal in a browser and log in
- Select the U-Prox MPX to which you want to add the wireless sensor from the list of devices
- Press the button (+) (“Add radio device”), the security center enters the mode of registering sensors, keypads, etc. In this window, you can click on the device icons and view the instructions for activation.
- According to the instructions, turn on the wireless sensor and bring it to the security center at a distance of about 1 meter
- Wait 15-20 seconds for the wireless sensor to be registered.
WARNING. THE DEVICE WILL BE ADDED TO THE FIRST FREE ZONE WITH THE LOWEST NUMBER
The app will open the settings of the wireless sensor. Configure your device.
Basic settings of U-Prox PIR
Select the device you want to configure from the device list
- “Name” – the name of the device
- “Group” – selects the security group to which the device belongs. A security group is a logical set of zones of a protected premises (for example, a room, apartment, garage, floor of a building, etc.), a minimum security unit. A security group allows you to manage all zones simultaneously. Security groups are independent – the user can manage and view only those security groups, devices, and events in them to which he or she has been granted access.
- “Sensitivity” – setting the motion detection range of the sensor. Low is about 6 meters, Medium is about 8 meters, and High is about 12 meters.
- “Light indication” – turns on or off the light indication on the device
- “Temperature limits notification” – when the device exceeds the specified temperature limits, it will generate the corresponding events – “Cooling” and “Overheating”. Can be used in scenarios
- “Setting” (zone type for the motion sensor, PIR) – device operating modes depending on the type of use
- “Delayed” or “Entrance zone”: if the system is armed, the entry delay starts when the sensor is triggered. If the system is not disarmed during the delay, the system switches to the Alarm state and sends an alarm notification
- if the system is armed, when the sensor is triggered, the system switches to the Alarm state and transmits an alarm notification
- Without delay
- if the system is armed and there is no entry delay or the delay time has expired, the system switches to the Alarm status and transmits an alarm notification
- if the system is armed and there is an entry delay, the system does not respond to sensor triggering of this type
- if the system is disarmed, the system does not respond to sensor triggering of this type
- “Corridor”
- if the system is armed and there is no entry delay or the delay time has expired, the system switches to the Alarm status and transmits an alarm notification
- if the system is armed and there is an entry delay, the system does not respond to sensor triggering of this type
- if the system is disarmed and there is a delay in exit – the system does not respond to the triggering of a sensor of this type
- “Internal corridor”
- if the system is armed, when the sensor is triggered, the system switches to the Alarm state and transmits an alarm notification
- if the system is armed in the Perimeter mode (“Stay” or “Night mode”), the system does not respond to sensor triggering of this type
- if the system is disarmed, the system does not respond to the triggering of a sensor of this type
- 24-hour zone (around the clock)
- when the sensor is triggered, the system switches to the “Alarm” state and transmits an alarm notification in any system mode
“Delayed entry (only for the Delayed installation type). Time to disarm (disarm) the security system after entering the premises.
ONLY FOR THE DELAYED INSTALLATION TYPE (“INPUT ZONE”)
- “Delayed exit (only for the Delayed arming type). The time to leave the premises after arming or disarming.
- “Delay for entry in Stay Armed mode” (only for the Delayed arming type). Time for disarming (disarming) the security system after entering the premises (arming in Stay, Night mode)
- “Intelligent Alarm Recognition”. When this setting is enabled, the motion sensors of this security group are combined into a single “smart zone” with the alarm confirmation function.
- When one of the sensors in the smart zone is triggered, a delay starts counting – 20 seconds by default. If during this time the Alarm condition occurs for any sensor within this group, or a repeated Alarm condition occurs for the same sensor, or the sensor remains in the Alarm condition until the smart zone delay expires, an alarm signal will be transmitted to the security company.
“Arming with a broken sensor” – forced arming of a sensor, even if it is broken
- “Forced arming after exit delay” – if the sensor does not recover after the exit delay countdown, the system switches to the Alarm status and transmits an alarm notification
- “Forced arming when the sensor is restored” – the system waits for the sensor to be restored and switches it to the Armed mode
Testing the connection
WARNING. BEFORE PERFORMING THIS STEP, THE DEVICE MUST BE REGISTERED IN THE UPROX SECURITY SYSTEM.
Launch the U-Prox Installer application or log in to the U-Prox Installer WEB portal
Select a security center from the list
Select a device from the list
Start the test mode and select a mode – trigger test, normal signal test, Grade II signal test
-
- Trigger test – checking the operation of the motion sensor
- Conventional signal testing
ATTENTION!!! TESTING IS PERFORMED AT AN AVERAGE POWER LEVEL OF RADIO TRANSMITTERS.
c. Signal testing in accordance with Grade II
ATTENTION!!! TESTING IS PERFORMED AT REDUCED POWER OF RADIO TRANSMITTERS, IN ACCORDANCE WITH EN 50131-1
To start testing the signal strength of the device, wait for the next communication session with the device, or trigger it, or remove its backplate.
Move the device to the pre-selected installation location.
Based on the data in the U-Prox Installer or U-Prox Installer WEB mobile application, select a location with an optimal signal strength of at least -95 dBm.
You can also use the light indication of the device.
- LED flashes green (up to -87 dBm) – excellent signal strength, can be set
- LED flashes yellow (up to -88 … -94 dBm) – average signal strength, can be set
- LED flashes red (up to -95 … -111 dBm) – poor signal strength, move the device to another location or use the UProx Extender radio range extender
- To exit the signal test mode, click the “End Test” button in the application
ATTENTION!!! THE TEST WILL BE AUTOMATICALLY COMPLETED 30 MINUTES AFTER THE START
Remove a device
Launch the U-Prox Installer application or log in to the U-Prox Installer WEB portal
Select a security center from the list
Select the device from the list, click the “Uninstall” button, and confirm the removal
Wireless device states
Service
The device normally requires minimal maintenance.
Use a dry cloth suitable for appliances to periodically clean the device case from dust and other contaminants as they appear.
Replacing the battery
- Remove the device from the backplate by sliding it upward.
- Unscrew and remove the rear housing cover.
- Replace the battery and reassemble the device.
- Dispose of used batteries in accordance with local laws and regulations.
Compliance with standards
- RED (Radio Equipment Directive) Directive 2014/53/EU
- EU ROHS Directive 2011/65/EU, EN IEC 63000:2018
- EN 62311:2008
- EN 62368-1:2014
- EN 50131-1 Grade 2, Class II:
- EN 50131-1:2006/A1:2009/A2:2017/A3:2020
- EN 50131-2-2:2017
- EN 50131-5-3:2017
Warranty obligations
The warranty period for the U-Prox device (excluding batteries) is 2 years from the date of sale.
If the device is not functioning properly, first contact support@uprox.systems, perhaps this issue will be resolved remotely.
The scope of delivery
- U-Prox PIR;
- CR123A battery (pre-installed);
- Backplate for the wall;
- Corner backplate;
- Installation kit;
- Quick start guide
Uploads
Technical documentation
Photos of the devices
Photos for online stores
Declaration of conformity
CE certificate
Declaration of compliance with RoHS
Security Grade certificate
Full user manual
Questions and answers
-
Most of the sensors are powered by lithium batteries. They have sufficient capacity and operating temperature range.
Thanks to the adaptive power of the radio transmitters and the optimized data transmission protocol, the service life can be up to 7 years. The shortest service life of alkaline batteries “finger” or AAA, which are installed in the keyboard – up to 2 years.
But the replacement does not even require a screwdriver, the keyboard is removed using a regular plastic discount or bank card.
-
15 years ago massively used wired phones, mobile phones were either business or luxury. Now almost everyone has a mobile phone. It’s not only comfortable. The quality of wireless communication is steadily increasing.
The same situation with security systems. Wired systems require high-quality cable, trained personnel with electrical education, quality installation with line inspection, construction work with drilling, wiring, and other inconveniences. All this requires a lot of time.
As a result, we have a total cost that includes work. And compared with wireless systems, it is much higher. The wireless security system can be installed independently, the kit includes everything you need for installation.
The U-PROX security system has U-PROX BAND radio communication technology. It has unsurpassed characteristics in range, resistance to interference, due to channel redundancy, and is very efficient in terms of energy consumption.
-
It is reliable communication that distinguishes the U-PROX security system from its competitors. We use DSTU GOST28147-89 encryption with reverse gamma, 256-bit key (3DES level).
Any of our radio devices operates in the notification (notification) mode, not polling, that is, as soon as an event occurs, it is immediately transmitted to U-PROX. In turn, the security center confirms the reception of the data packet by sending a response. The communication is two-way, imitation-resistant: the packet contains the detector serial number and the packet sequence number, which makes it impossible to replace the detector or send the same data packet by an intruder.The detector periodically sends data about its status to U-PROX, notifying that it is “alive”. We call this a “heartbeat”. In response, it receives confirmation and additional commands.
If the detector is installed in a place with poor conditions, it is used:
- increasing the radio communication power – 3 gradations of the transmitting device power are available,
- switching the data rate to improve the sensitivity of the receiving path,
- switching to other (backup) channels in the frequency range of 868.0 … 868.6 MHz.
In turn, the basic U-PROX device has 2 transceivers that work simultaneously to receive signals on different channels and speeds. And of course, there is a definition of radio jamming.
-
Your device communicates with the security company via two GPRS/LTE channels and the Internet – Wi-Fi or Ethernet.
If you try to “jam” or somehow block the communication channel, U-PROX will send a signal informing you.
-
Yes, if the security system uses the U-PROX PIR Cam detector with photo fixation.
Thanks to it, users of the U-PROX Home mobile application can receive a photo from the detector at any time by pressing one button.
Also, when a photo is received on request, it is possible to save it to the user’s smartphone photo gallery and enlarge it if necessary.
The owner of the security system can also configure permissions to send photos in case of an alarm to security companies.
-
Wi-Fi is a wireless technology for connecting devices to the wired Internet.
It is implemented in all security centers (hubs).
The central unit in this case can be placed anywhere.
-
- We believe that this is our future – in 2-3 years, wireless equipment will occupy a large part of the security systems market. Almost everything will be wireless, and prices for such solutions will decrease.
- Wireless solutions are fast, convenient, and reliable.
- Will not spoil the interior design and renovation during installation, as it requires minimal installation work.
- Minimize the time spent on installing the security system.
- U-PROX WDC, U-PROX Wireport, U-PROX Multiplexer and U-PROX Siren have wired inputs to which wired devices can also be connected.
-
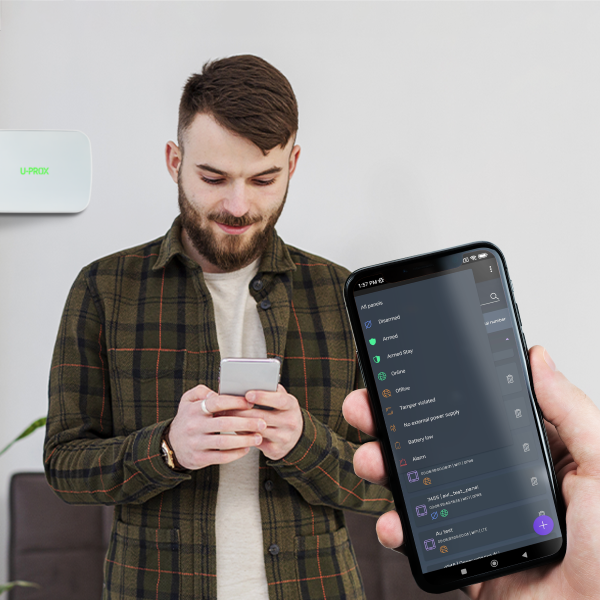
The use of mobile applications U-PROX Home and U-PROX Installer allowed to separate system settings and management.
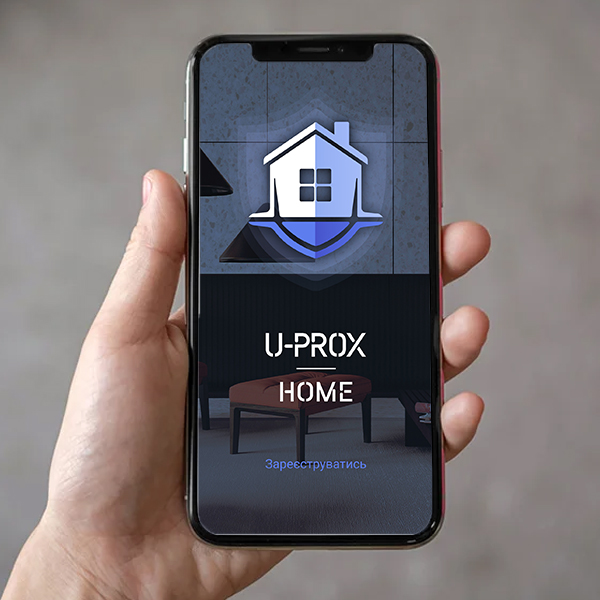
The U-PROX Home application is used to control the U-PROX security system. The application implements the required set of functions:
- Arming.
- Disarming.
- Arming in night mode.
- Alarm button.
- Event history with simple filters.
- View temperature from sensors.
- Add camcorders with zones.
- Watch the video from a connected camera.
- In the event of any failure in the system application, U-PROX brings this information to the home screen, and notify the user via Push message.
U-PROX Installer is used to configure the security system. Through an application is performed the primary activation of the sensors
-
The security group is a logically independent unit in the security system.
It combines a group of sensors, which is placed and removed from protection separately and independently of others.
This can be done by a user who is authorized to manage a specific group.
-
This is a function that can work in any of the security groups.
It is implemented as follows. Consider the example of the house. When people put guards in this mode, the sensors that protect the perimeter: doors, windows, or even the entire first floor – become active. Other sensors – indoors – inactive. So, you can move freely inside the room, and intrusion from the outside will be detected.
-
The sensors are powered by their own batteries.
And the U-PROX security center is equipped with a lithium-ion battery, which will provide autonomous power for 24 hours.
And if this is not enough, then you can use the design feature of U-PROX devices – an input power supply of 12V DC, which means that an external uninterruptible power supply can be used, or a car battery, then the autonomous life can be increased, even up to several weeks.
-
It is very easy to install the U-PROX security system. Everything you need for installation: screws, fasteners, come complete with each sensor. The devices have simple mounts. Installation of the sensors to the required space can be done using screws or using two-way tape.
The overall security system installation will take about 10-15 minutes.It is very easy to install the U-PROX security system.
Everything you need for installation: screws, fasteners, come complete with each sensor. The devices have simple mounts.
Installation of the sensors to the required space can be done using screws or using two-way tape.
The overall security system installation will take about 10-15 minutes.
-
- Modern energy-saving technologies allow you not to think about replacing batteries for several years (2-7 years).
- 2 weeks before the full discharge, the security system will warn you and the service security organization about the discharge.
- Popular battery sizes are used ААА, CR2, CR123A і CR2032.
-
This is implemented using cloud technology.
With the security panel, the system works directly, “without intermediaries”.
With the user’s smartphone, the mediator is the cell of the device in the cloud, through which events are displayed on the smartphone and control commands from the user are passed.
-
Modern systems work via an Internet connection, this is mobile Internet in LTE networks or fixed cable.
U-PROX uses both connections, thus providing data transmission redundancy to the monitoring station in case of blocking or jamming of GSM-communication or cable breakage.
Control of communication with the device is provided by the monitoring panel.
-
You can prevent water leaks in your apartment or house thanks to automation devices from U-PROX. The flood prevention system warns you of an unwanted water leak in the U-PROX Home app and automatically shuts off the water supply in case of a pipe burst or a malfunction of the washing machine.
The smart valve control and power supply device allows you to automatically shut off/open the water supply when arming/disarming the room.
You can also create personalized schedules for arming/disarming/operating the relay/water valve.
-
We use a proprietary technology called “U-PROX BAND”, it operates in the 868.0-868.6 MHz frequency range allocated for such systems and transmitter powers allowed without licensing up to 25 MW in the basic device, up to 20 mW in detectors, 10 mW in key fobs, with dynamic adjustment (the first exchange attempt is always at minimum power).
U-PROX BAND has significant advantages over its competitors: the length of the packets transmitted over the air is almost two times less, the optimized retry algorithm (energy consumption-wise), the sensitivity of the detector receivers is higher (this is the range both in line of sight and in building conditions). The U-PROX security center has two transceivers operating at different frequencies in the permitted range, providing redundant data transmission from sensors.
One of the “tricks” of U-PROX BAND is the function of updating the software of all elements over the air. If any shortcomings are corrected or the functionality of the device is added, then the owner and the security company do not need to worry about dismantling, sending for an update. The update will occur automatically after the automatic update of the basic device.
-
The U-PROX security system has a refined design.
As standard, the cases of devices are executed either white or black.
For WDC sensors, the white starter kit includes replaceable dark brown housings.