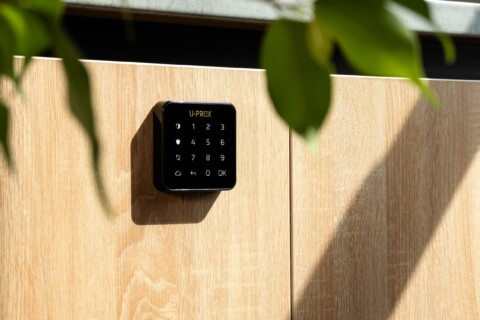
Select the device you want to configure from the list of devices.
1. “Name” – the name of the device
2. “Group” – select the security group to which the device belongs. A security group is a logical collection of protected zones (for example: a room, an apartment, a garage, a floor of a building, etc.), representing the minimum unit of security. A security group allows you to control all its zones simultaneously. Security groups are independent – a user can only control and view those groups, devices, and events to which they have been granted access.
3. “Sensitivity” – sets the detector’s motion‐detection range.
High – approximately 12 meters
Low – approximately 6 meters
Medium – approximately 8 meters
4. “Light indication” – turning the light indication on or off on the device
5. “Temperature Threshold Alerts” – when the temperature moves outside the specified limits, the device will generate corresponding events: “Cooling” and “Overheating”. This can be used in automation scenarios.
6. “Settings” – device operating modes depending on the type of use
a) “With Delay” (Entry Zone):
Armed: Triggering this sensor starts the entry delay countdown. If the system is not disarmed before the delay expires, it goes into Alarm and sends an alert.
Arming: When you arm the system, it first waits for the exit delay to expire, then the system becomes fully armed.
b) “No Delay”:
Armed: Triggering this sensor immediately puts the system into Alarm and sends an alert.
Disarmed: The system ignores this sensor.
c) “Perimeter” (Corridor):
Armed, no entry delay or delay expired: System goes into Alarm and sends an alert.
Armed, entry delay in progress: Sensor is ignored.
Disarmed, exit delay in progress: Sensor is ignored.
Disarmed: Sensor is ignored.
d) “Interior Corridor”:
Armed, no entry delay or delay expired: Alarm is triggered.
Armed, entry delay in progress: Sensor is ignored.
Disarmed, exit delay in progress: Sensor is ignored.
Armed in Perimeter-only mode (“Stay” or “Night”): Sensor is ignored.
Disarmed: Sensor is ignored.
e) “Interior Zone”:
Armed: Triggering this sensor immediately alarms and sends an alert.
Armed in Perimeter-only mode (“Stay” or “Night”): Sensor is ignored.
Disarmed: Sensor is ignored.
f) “24-Hour Zone” (Always Active):
Triggering this sensor immediately alarms and sends an alert in any system mode (armed or disarmed).
7. “Entry Delay” (only for the “With Delay” installation type): The time allowed to disarm the security system after entering the protected premises before an alarm is triggered.
Only for the “Delayed” (“Entry Zone”) installation type
8. “Exit delay” (only for the “Delayed” installation type). The time allowed to exit the premises after the security mode has been activated (armed).
Only for the “Delayed” (“Entry Zone”) installation type
9. “Entry Delay in ‘Stay’ Mode” (only for the “With Delay” installation type): The time allowed to disarm the security system after entering the premises when it has been armed in “Stay” or “Night” mode.
Only for the “Delayed” (“Entry Zone”) installation type
10. “Exit Delay in ‘Stay’ Mode” (only for the “With Delay” installation type): The time allowed to exit the premises after arming the system in “Stay” (Perimeter) or “Night” mode.
Only for the “Delayed” (“Entry Zone”) installation type
11. “Arming with a Faulted Sensor” – forcibly arms the sensor even if it’s currently faulted.
“Force Arm upon Sensor Restore” – the system waits for the sensor to clear and then automatically arms that sensor.
“Force Arm after Exit Delay” – if the sensor has not cleared by the end of the exit delay, the system goes into Alarm and sends an alert.
12. “Photo size” – camera resolution
13.”Number of photos” – the number of photos taken by the detector during an alarm
14. Special settings
a) “Disable Tamper” – when enabled, the device will not react to its enclosure being opened.
b) “Disable Alarm on Communication Loss” – do not generate an alarm if the device loses connection.
Review the following utility documents:
“shrink_DB_modif.pdf”https://drive.google.com/file/d/1HytIr2ONrKiMIJ9QpkQ9bVnR36qsOrlM/view?usp=sharing
“auto_delete_backup_DB_U-Prox.pdf”https://drive....
As “FortNet” integrated an older 2016-release modification of the U-Prox Desktop USB reader that used a COM-port speed of 2400 bps—and provided no support for our newer USB devices (which use 9600 bp...
To set the engineer password, you need to connect (twist) two reader contacts—Data0 (WD0) green and Data1 (WD1) white—while the power is off, and then turn on the reader.
Then bring your smart...
To add a key fob for a user, you need to go to the U-Prox Installer app and select your control panel.
Select the user to whom the key fob will be linked
And click Add.
Then, fol...
This document outlines three possible configurations for implementing an interlock system using U-PROX equipment. These are basic schemes that can be either adapted to specific user requirements or u...
Database files are named as follows:
UProxIP.mdf / GGLite.mdf – main database
UProxIP_log.ldf / GGLite_log.ldf – SQL Server transaction log for the main database
UProxIP_01.mdf / GGLite_01....
The most common reasons a device cannot be added to your account are:
The device is already added/activated under another U-Prox account.In this case, you’ll need to identify the user who activat...
The U-PROX system supports integration with BasIP panels (models AV-07, AA-12, as well as other models from the AV, AA, and BA series) in current software versions.
However, due to the fact that B...
Lorem ipsum dolor sit amet, consectetur adipiscing elit, sed do eiusmod tempor incididunt ut labore et dolore magna aliqua. Ut enim ad minim veniam, quis nostrud exercitation ullamco laboris nisi ut ...
General information:
An electronic key—also known as a mobile identifier—is held within the U-Prox ID app and can be presented to our readers:
Over Bluetooth (10 cm–10 m, depending o...