How to use the keypad codes and PIN code in U-PROX controllers
How to use the keypad codes and PIN code in U-PROX controllers
Share and save
In the U-PROX system, you can use the following as an identifier:
physical cards of ASK/FSK/MIFARE (125 kHz / 13.56 MHz) types – Em-Marin, HID Proxcard II, MIFARE Classic / Ultralight / Plus / DESFire, bank chip cards
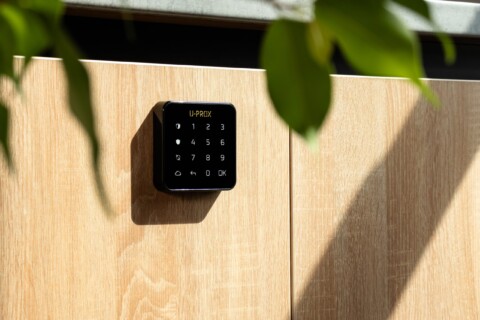
Keypad code (on readers with a keypad)
U-PROX ID mobile identifier (2.4 GHz – Bluetooth)
U-PROX TAG and U-PROX Auto TAG keyfobs (2.4 GHz – Bluetooth)
Entering the code on the keyboard is confirmed by pressing the button «#».
The minimum length of a keypad code supported by U-PROX software is 3 characters (6 characters in older versions of the software).
This code is stored in the database as an identifier in the form of “FFFFFFF123”. It is forbidden to use the characters “A”, “B”, “C”, “D”, “E” in general, as well as “F” after numbers or between them.
The U-PROX software provides for the concept of a “PIN code” – an additional digital code that is linked to the main identifier in the system. Its length can be from 1 to 6 decimal characters, and it can be requested for entry after reading the main identifier, depending on the door settings.
Keypad code and PIN code are different concepts in terms of meaning:
the keypad code is used as the main identifier,
PIN code as an additional protection to the main identifier.
To activate the use of the PIN code, in the door settings, set a non-zero value for the “PIN code entry time, sec” parameter and upload the configuration to the controller.
Usually, the PIN code entry waiting time is set to 10 seconds or more so that the user has time to enter the code on the keyboard and press “#” (to confirm the PIN code entry).
When the reader of such a door reads the identifier to which the PIN code is assigned, the display changes to yellow – this is a signal of waiting for the PIN code to be entered. If the code is not entered or the entry is not completed on time, access is not granted, the door returns to the regular mode, and the system records the event “PIN code entry time expired”.
For identifiers that do not have a PIN code, the system will not ask for it at such doors.
For two single-sided doors on the IP400 controller, the “PIN entry time” parameter is activated on the door to which reader #1 is connected. In this case, the setting applies to the entire controller, i.e. it is valid for both pairs of doors.
If you want to enable PIN code request only on one side of a double-sided door, or only on one of the two single-sided doors of the IP400 controller, or to set up a mode in which the PIN code works according to a schedule (for example, during the day – without a code, at night – with a code), then you need to:
Use the recommended software version and follow the recommendations below.If you plan to use current versions of SQL Server, review the installation instructions in the “Installation Rules” file incl...
U-PROX Tag is a contactless active identifier for authorizing users of access control systems in the hands-free mode. It has a built-in activation button.
It works with U-PROX SmartLine readers an...
Lorem ipsum dolor sit amet, consectetur adipiscing elit, sed do eiusmod tempor incididunt ut labore et dolore magna aliqua. Ut enim ad minim veniam, quis nostrud exercitation ullamco laboris nisi ut ...
As “FortNet” integrated an older 2016-release modification of the U-Prox Desktop USB reader that used a COM-port speed of 2400 bps—and provided no support for our newer USB devices (which use 9600 bp...
Unpack the utility shrink_db_all_modif.bat from the archive shrink_db_all_modif.zip into the database directory (C:\Program Files (x86)\A2SoftIn\UProxIP), and, as needed, run ...
All new equipment that supports working via Bluetooth – is programmed from the mobile configurator, and the U-Prox Desktop USB reader can also be (programmed) via the COM port (from the COM-port cons...
Choice of installation location
Carefully choose the installation location of the U-Prox PIR Cam device, taking into account the orientation of the lens, the camera, and the presence of obstacles ...
Launch the U-Prox Installer application or log in via the U-Prox Installer WEB portal.
2. Select a security center from the list
3. Select the device from the list, click th...
The U-Prox device operates on 12V, so it can be powered by appropriate power banks, uninterruptible power supply systems, and charging stations. If necessary, the device can also be powered from a ca...
Lorem ipsum dolor sit amet, consectetur adipiscing elit, sed do eiusmod tempor incididunt ut labore et dolore magna aliqua. Ut enim ad minim veniam, quis nostrud exercitation ullamco laboris nisi ut ...
 Україна