U-PROX ID mobile identifiers: using QR codes and more
U-PROX ID mobile identifiers: using QR codes and more
Share and save
General information
The electronic key, also known as a mobile identifier, is the container of the U-PROX ID application, and it can be transferred to a reader of our production:
via Bluetooth (10cm to 15m, depending on the reader settings) on Android and iOS smartphones;
via NFC channel (up to 10 cm) only on Android smartphones, NOT supported on iOS (NFC is not yet available in U-Prox ID on iOS).
Electronic key (mobile identifier) – must be purchased for further registration in the U-PROX ID application on a smartphone, and registration in the ACS software to provide access via it.
– the logo of the old application (it can contain only 1 key of the same type)
1 piece (of the same type) is supported for a smartphone – for the old application.
– logo of the new accessory (may have more than one single key)
more than 1 piece (of the same type) per smartphone is supported – for the new version of the program with the Ū logo.
To register the key in your smartphone from a QR code, it is recommended to be in the 3G/4G(LTE)/5G network of the mobile operator to avoid possible restrictions on access to the licensing server in Wi-Fi networks.
switch to the “Internet” from your mobile operator, and try to register the QR code again;
or have Wi-Fi networks without restricted access rights.
According to the current technology, the key is registered in the “U-PROX ID” application on a smartphone and can be used in compatible systems where U-PROX SL/SE readers are used.
It is not possible to take it back from the smartphone, only to delete it in the application or together with the application, but the key is lost and cannot be re-registered.
The current versions of the U-PROX ID application have the ability to backup/restore (transfer) keys within the same Google or Apple ID account, the corresponding item in the application settings.
For older versions of the app:
if one key is already registered in the “U-PROX ID” on the smartphone, the next key of the same type will not be registered there, you must first delete the previous one.
For new versions of the app:
you can register more than 1 key of the same type
if one key has already been registered in the “U-PROX ID” on the smartphone, the next key of the same type can be registered.
Using a “mobile identifier” in the U-PROX ID application
It can be used in ACS of our production:
physical identifiers – ASK/FSK/Mifare cards/chipped bank cards;
keyboard codes;
electronic keys – mobile identifiers “U-PROX ID”, an application on the Android/iOS platform.
Any identifier is registered in the ACS system by the user/administrator, regardless of the type or method of obtaining the identifier, and the option of issuing it to the client.
Mobile identifiers “U-PROX ID” can be provided for registration in the form of:
QR-codes (graphic file) – sent to customers manually (e-mail, messengers) to register the relationship and enter their code into the ACS database manually, or read from a smartphone upon registration, just like regular cards;
QR-links – through the web interface of the software, issuance to the client (already available in the ACS database), and sending to his e-mail for registration in the application (requires preliminary settings for working via ACS e-mail);
Special file for USB reader U-PROX Desktop – local delivery to the location and registration in the ACS.
“QR codes are a link to a cloud server for uploading/validating mobile identifiers to the U-PROX ID application – one of 2 possible options for obtaining mobile identifiers.
Once mobile IDs are activated on a smartphone, they can be transmitted for reading by our readers via a channel:
Bluetooth – Android ta iOS smartphones;
NFC – only Android smartphones (at the moment; for iOS, this option is expected later), when the corresponding setting is enabled in the application.
Currently, U-PROX ID mobile identifiers are a one-time registration (permanent/network type), i.e., the key issued when deleted from the application is not re-registered.
The current versions of the U-PROX ID application have the ability to backup/restore (transfer) keys within the same Google or Apple ID account, the corresponding item in the application settings.
For the old version of “U-PROX ID”:
if there is already a key of this type in the device, the new one cannot be registered until the old one is removed.
For the new version of “U-PROX ID”:
if the application already has a key of this type, you can register the following new ones.
QR codes are distributed for registration directly to the U-PROX ID application – through the camera or as a file (archive with *.png files), and then the code is entered into the software manually and assigned to the user (again, the current version of the U-PROX software is recommended).
The QR contains all the necessary information that can be manually entered into the program database, depending on the system and software used (format and bit depth of the identifier).
Sample:
If you have U-PROX software version 3.52.1 or higher, you can specify the full 16-character code (HEX), and the program will display it accordingly – as a QR (something similar to the smartphone logo).
For other systems, or for lower versions of U-PROX software, it is enough to specify a 5-byte code (it will look like a regular card), in HEX or DEC format (or its subtype – F.C., “Facility Code”).
Checking the validity of QR codes (valid/expired) – for registration of U-PROX ID mobile identifiers:
Detailed information on mobile identifiers and their use:
The identifier can be transmitted via Bluetooth (10cm – up to 15m) for Android and iOS smartphones, and NFC (1-8cm) for Android smartphones only.
Actions with the “mobile identifier” key, which is already registered on the smartphone, are similar to actions with ordinary plastic cards in the ACS program.
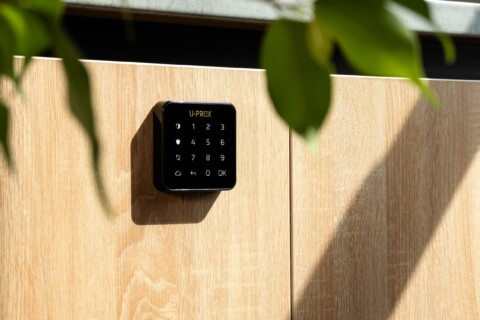
The mobile identifiers work with BLE-enabled readers manufactured by ITV Ltd. and released in 2018 (except for U-PROX keypad and U-Prox mini 485 models), and the current line of Smart Line readers (marked SL or SE).
Additional information:
on the Blogs page of our website – Questions and Answers – item #13.
document from the page “Programs and instructions”-“Mobile IDs”-“U-PROX ID mobile identifier”
Page “Mobile identification”-“Mobile IDs”
Additional explanations and the view of the “mobile identifier” in the U-PROX ID application:
When the “U-PROX ID” application is launched and the screen looks like this, this indicates the absence of ANY registered key – “mobile identifier”:
for old and new versions of the device:
For older versions of the U-PROX ID app:
If you already have at least one of the possible keys (offline, network, encrypted) registered on your smartphone, the screen will look like this:
If you tap the “wallet” icon at the bottom right, the menu of registered keys will open, where you will see which types are already available in this smartphone/application:
Key Personal / Autonomous
autonomous key (blue), free of chargeonly for autonomous use in U-PROX IP550/560 controllers (these controllers are out of production) there can be only one of this type in the application
Key Network / Network / Permanent
a regular network key (blue), only one of this type can be paid for in the application
Key Encrypted
encrypted network key (red), paid for by a system closed to other mobile keys, is obtained from encrypted QR or encrypted USB reader U-PROX Desktop (the “BLE cipher” field), there can be only one of this type in the application
The Use by default checkbox indicates which of the available keys will be transmitted in the Lighted Screen mode.
For NFC transmission – the key selected for display on the main screen and application is used.
In the “U-PROX ID” request for “screen flicker” operation – specify which key to use for the customer.
For new versions of the U-PROX ID app:
Swipe left/right to select the registered different types of keys available on your smartphone/application.
The main menu will display the registered keys, including the keys that have been registered:
Key Personal / Autonomous
standalone key, free of chargeonly for standalone use in U-PROX IP550/560 controllers (these controllers are out of production)
Key Network / Network / Permanent
regular / network / permanent key, paid
Key Encrypted
encrypted network / permanent key, paid for systems that are closed to other mobile identifiers (received from encrypted QR or from an encrypted USB reader U-PROX Desktop (field “Encrypt Mobile ID (BLE)”)
You can also change the appearance and name of all keys.
Starting the mobile ID transmission – can be done in several ways:
press the “square”/”round with a lock” button in the application interface in the center of the screen, within the range of the reader, search-transmission time 0.5-1.5 seconds, distance 1cm – 15m, depending on the reader response settings;
short press on the “gear” icon in the “bottom left”/”top right” of the screen, and in the menu turn on the “When the screen is turned on” mode – then the mobile ID will be transmitted as soon as the smartphone screen is activated (from a locked device), within the range of the reader, the search-transmission time is 0.5-1.5 seconds;
short press on the “gear” icon on the screen, and in the menu turn on the “Use NFC” mode (this option is currently available ONLY on Android smartphones), then the mobile ID can be transmitted:
when the smartphone is unlocked – within the range of the reader (1-8 cm) that supports Mifare reading (respectively, NFC), the transfer time is no more than 0.25-1s
when the smartphone is locked (optional, depending on the smartphone model) – within the range of the reader (1-8 cm) that supports Mifare (respectively, NFC) reading, the transmission time is no more than 0.25-1s when the NFC smartphone is brought to the reader with the antenna;
short press on the “gear” icon on the screen and select “Hads free mode” in the menu – there will be a second-by-second Bluetooth transmission, and, depending on the reader’s range settings, when you approach the reader, data will be exchanged and the ID will be read.
You can also use U-PROX ID widgets for Android and IOS platforms, and install the widget on Apple Watch:
There is no difference in the logic of operation/registration of a mobile key on Android or iOS.
Actions with the “mobile identifier” key, which is already registered on the smartphone, are similar to actions with ordinary plastic cards in the ACS program.
The “mobile identifier” key, the container of which is the “U-PROX ID” mobile application, can be obtained:
For autonomous systems of U-PROX IP550/IP560 controllers – when using the U-Prox Config mobile application, actions are sent via messengers or e-mail, and autonomous keys are created (see the procedure in the relevant device documentation).
For all other options, keys are paid:
In the USB reader U-PROX Desktop – there are 5 pcs. prepaid,
you can get them from there, provided that you have registered a “master card” for U-PROX Desktop, without which a mobile ID cannot be issued, and in the “U-PROX ID” application – select “receive from U-PROX Desktop”
for the U-PROX Desktop of the first modification, with a serial number (GID) starting with 00:32:00:…
does not apply to the U-PROX Desktop of the second version, with a serial number (GID) starting with 00:4E:FE:…;
if all available keys from the U-PROX Desktop USB reader are written off, then 0 keys are available. Then get a new number – buy the necessary ones, indicating that the keys are under the GID (container) – U-PROX Desktop.
Get a mobile identifier in the form of QR codes and register it in the application by scanning the code or opening a graphic file of the corresponding code.
if all the keys from the available QR codes are used, get new ones – buy the required number of new QR codes in the retail network.
Repeated keys from a QR code are NOT registered.
Mobile ID keys are supposed to ensure the uniqueness of the number, and therefore they are essentially a one-time registration – reuse for registration is NOT possible!
If the smartphone with the installed application and registered keys is reset to factory settings, the same is true if the gadget is “flashed”, or the U-PROX ID application is simply deleted, all keys (offline, network, encrypted) are lost. It is NOT possible to re-register them.
However, the current versions of the U-PROX ID app have the ability to backup/restore (transfer) keys within the same Google or Apple ID account, the corresponding item in the app settings.
For older versions of the application, the only way to save the key is to back up all smartphone data using the capabilities provided by the manufacturer of the device and then restore this data.
Additional information
USB reader U-PROX Desktop – comes with 5 prepaid mobile identifiers, you need to use them:
Create a master card in U-PROX Desktop:
U-PROX Config mobile configurator – Bluetooth connection – “Next” submenu – “Replace card wizard” menu.
There can be 2 master cards, and it is recommended to use ONLY Em Marin cards, the 3rd registered master card replaces the 1st, the 4th replaces the 2nd, and so on;
Also, the master card is required only to authorize access to U-PROX Desktop and to issue mobile identifiers from it
the created master card can be replaced with another one, but deleting master cards is not available to the user, you need to contact our technical support, indicating the GID of the U-PROX Desktop and the seller of this U-PROX Desktop.
Issue a mobile ID from U-PROX Desktop:
put the master card on the U-PROX Desktop for authorization, and it should light up blue
then from the U-PROX ID application, select the option to receive a mobile ID from U-PROX Desktop by holding your smartphone near U-PROX Desktop.
When setting up U-PROX Desktop – we do NOT recommend entering data in the “BLE password” field, otherwise it will issue encrypted mobile keys
Regarding the use of “U-PROX ID” – GPS:
The need to enable GPS (Geolocation) is related to the technology used for communication between the smartphone and the reader, namely BLE (Bluetooth low energy, a subset of Bluetooth 4.xx).
This is a requirement of the Android (starting from 6.0) and iOS operating systems and the BLE technology stack, and it is impossible to get around it.
Similar applications from other vendors, such as Nedap and HID, that work with mobile tags also require GPS (Geolocation) to be enabled.
In Android devices, you can use an alternative method of transferring a mobile tag to the reader – via NFC.
We do not use GPS (Geolocation) data in any way, do not store it, and do not process it.
The U-PROX system includes built-in tools for integration with third-party software via API, with support for SOAP, REST, JSON, and XML standards.
U-PROX software is free of charge, as is the REST...
U-PROX PIR Cam is a combined digital, passive infrared, radio-channel detector equipped with a PIR sensor and a camera, designed to secure enclosed residential and industrial spaces.
By detecting ...
To set the engineer password, you need to connect (twist) two reader contacts—Data0 (WD0) green and Data1 (WD1) white—while the power is off, and then turn on the reader.
Then bring your smart...
Lorem ipsum dolor sit amet, consectetur adipiscing elit, sed do eiusmod tempor incididunt ut labore et dolore magna aliqua. Ut enim ad minim veniam, quis nostrud exercitation ullamco laboris nisi ut ...
MIFARE identifiers can contain a 4-byte or 7-byte code, which is read differently by different systems or equipment manufacturers. Therefore, U-PROX readers offer several interpretation schemes for t...
The U-Prox Installer WEB portal is designed for configuring the U-Prox wireless security system.
It is intended for both individual users and engineers of central monitoring organizations.
Usin...
Programming is carried out from the mobile U-Prox Config application via the Bluetooth channel.
You can download the U-Prox Config application from the PlayMarket or AppStore, as well as via the s...
To access the reader settings, you need to connect to the reader using the U-Prox Config application and the previously created administrator password.
There you can go to the reader set...
USB зчитувач U-Prox Desktop підтримує читання активної bluetooth мітки U-Prox TAG та U-Prox AU-Prox TAG Reader Requirements and Firmware Updates
Mod.1 (GID 00:32:00:…): requires reader firmware ≥...
Use the recommended software version and follow the recommendations below.If you plan to use current versions of SQL Server, review the installation instructions in the “Installation Rules” file incl...